Southern
Pacific
1218
Starting The Engine And Replacing A Leaky Liner
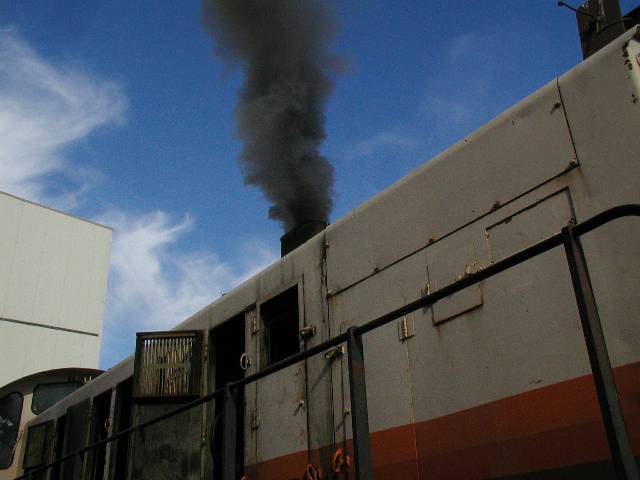
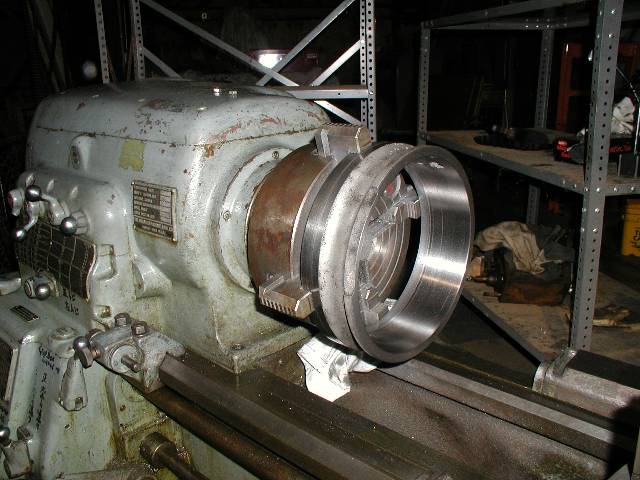
When the 1218 arrived on the property, there was no cooling water in the block. We checked the crankcase for water and were pleased to see that there was none. It is not uncommon for locomotive diesel engines, especially 50 year old ones, to have internal water leaks so no water in the oil was a good sign. We pulled all the injectors and put about a half cup of Marvel Mystery Oil in each cylinder to insure that there was lubrication in the bores. After some other preliminary work, we filled the block with water, jumped the batteries on the 1218 to another locomotive and began cranking the engine. It took quite a bit of time to get it to fire but when it did, there was a very satisfying eruption of black smoke from the stack and it settled down to run quite nicely. The smoke is caused by the lag in the turbocharger coming up to speed and supplying engine with the combustion air it needs.
 |
A few days after the successful engine start, I was working on something and noticed that there was oil dripping from under the engine. Investigation revealed that oil was running out of the dip stick hole due to water in the oil pan which had raised the oil level higher than it should be. And so began a journey through the reasons why a 6-251 Alco engine would have water in the oil pan. Ultimately, we discovered that the number 5 cylinder liner was the culprit. Unlike most gasoline engines, many diesel engines have replaceable cylinders, called "liners". I placed an order with Hatch & Kirk in Seattle for a liner, piston rings, connecting rod bearings and the necessary gaskets. We had to make a set of special tools that are required to pull the liner and the piston and then install the new liner. We did not get any photos of the first part of the process but the effort resulted in the cylinder head, piston and connecting rod sitting on a pallet.
 |
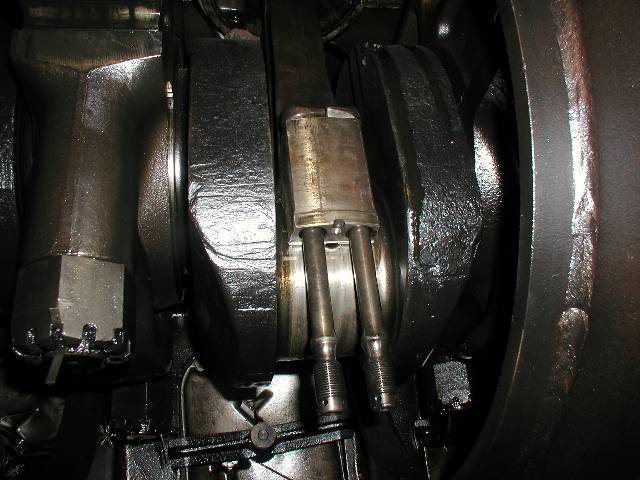
The liner is pushed into its hole in the block by hydraulic pressure so it is necessary to apply a lot of pull to get it out. The bar across the top of the liner supports a 1" threaded rod which is attached to a bar across the bottom of the liner. Turning the nut on the top of the rod results in pulling the bar and the liner up. Once the liner pops loose from its sealing surfaces, it easily lifts out.
 |
 |
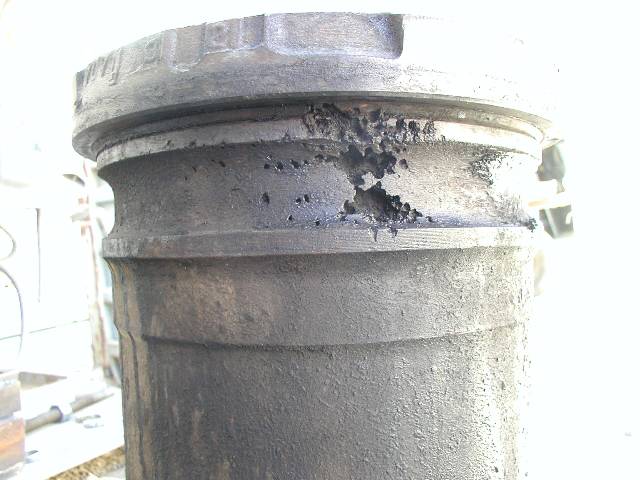
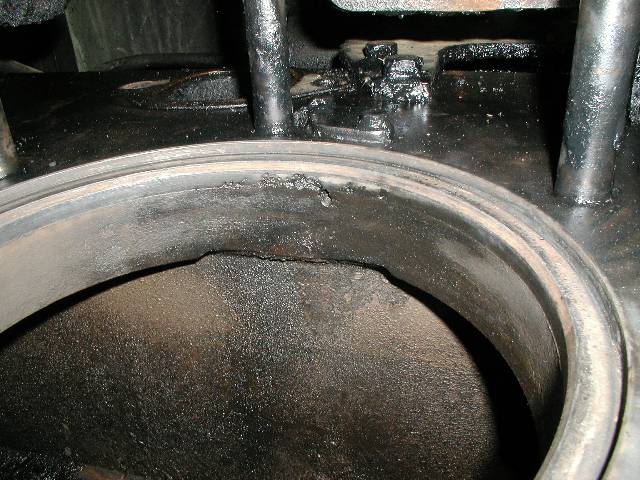
Once the liner was out, it was easy to see the defect that caused the water leak. The problem is called "cavitation". When combustion takes place in the cylinder, pressure waves are created within the water surrounding the cylinder. If the reader is interested in the effects of cavitation in an engine, the internet has thousands of technical treatises on the subject. Suffice it to say that it is a bad thing and caused the void seen in the side of the liner in the photo #1. Photo #2 shows the surface of the block directly opposite the liner damage. Luckily, these holes are not in a critical area.
 |
 |
In keeping with standard Alco practice, there is no head gasket used in the 6-251 engine. The mating surfaces of the head and liner are ground using fine grinding compound and a special surfacing tool. Lacking that tool, we inverted the head and set the liner in place on the head. With a coating of fine valve grinding compound in place between the had and liner, Jon and Rich proceeded to turn the liner against the head and let gravity do the grinding work. After a few minutes of this, the liner would be removed, both surfaces cleaned, and the process started again until there was a good mating surface all the way around.
 |
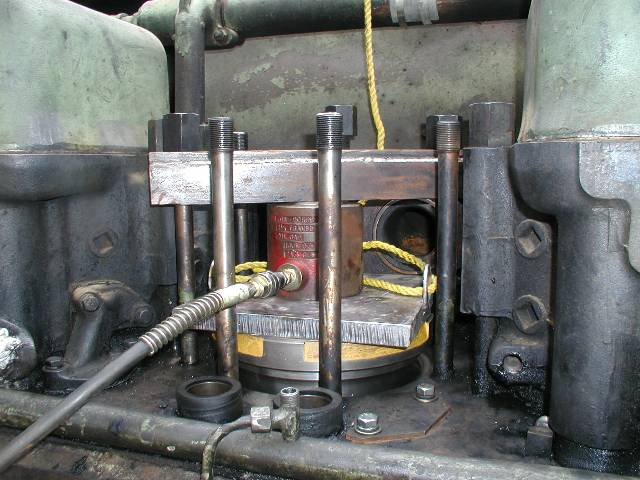
The process of installing liner involves using a large hydraulic jack to push the liner in place. The jack seen is attached to a hand operated hydraulic pump. The jack is sitting on a 1" steel plate which is in turn sitting on the top liner surface. The water sealing "O" rings on the liner were lubricated with Vasoline before the liner was jacked into place.
 |
In order to put the piston in the liner, it is necessary to compress the sealing rings on the piston, Our machinist Dan Espinosa made a ring compressor out of the old liner. After machining the liner for the new purpose, it is easy to see the cavitation damage. The compressor was put in place and the piston dropped down through the compressor and into the liner. A little pressure was necessary to get the piston to drop and care must be taken to have the rod bearing go over the crankshaft properly. Rich is seen operating a small ratchet lift attached to the piston. After this, the lower rod cap was put in place and the rod cap bolts properly tightened. Now, we have only 5 more potential leakers. (This turned out to be a very prophetic statement)
 |
 |
 |
 |
 |